Photoshop is no doubt the most popular image editing software and has a ton of great features. But for a typical website update you might only need to crop and resize a few images. Fortunately for those of us who don’t want to drop an extra $20-50 per month on Adobe products, there are some no cost options available. Read on to learn how to crop and resize graphics using software that is already on your computer as well as alternative, open source software you can install for free.
Cropping and Resizing Images with Free Programs in Windows
Photos (App) 
For basic image cropping and resizing, Microsoft finally has a built-in program for Windows that can handle these relatively simple and common tasks.
To get started, open the Photos app in the Start Menu or by typing “Photos” into search. Of course, since you will likely use this app more often, you’ll want to confirm that Photos is the default program associated with each major image type you will edit. To do this, just right click on the image file and select Properties. If the “Opens with:” section doesn’t say Photos, just click Change… and select the correct program from the list.

Once the image is open in Photos, you are ready to start editing.
Cropping
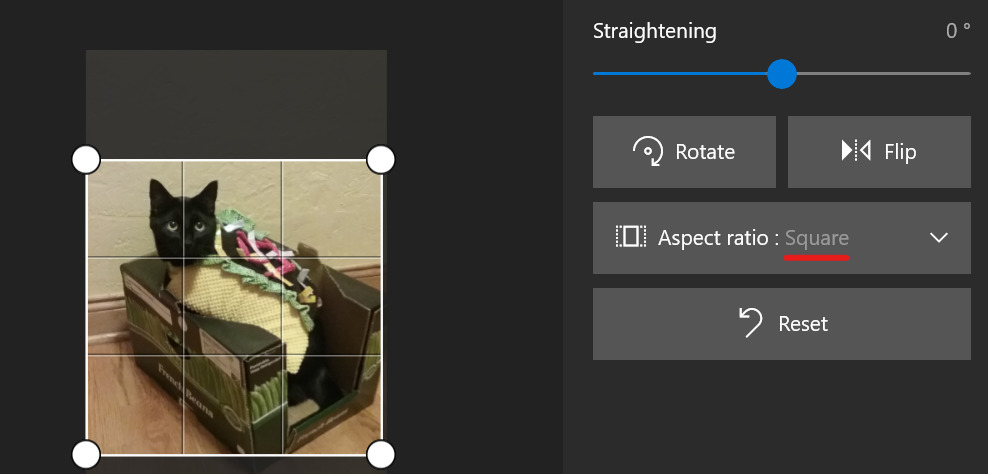
If you have a rectangular headshot but need to make it square, then the crop tool is for you. In Photos you do not need to hunt around for it, just click the crop icon on the right side of the toolbar.

You can then manually drag the white circles at each corner to the desired position.

If you want to get precise, like a perfect square, you can select “Aspect Ratio” and set it to square. Then just move the image to fit within the square or drag the corners to zoom in or out.
Resizing
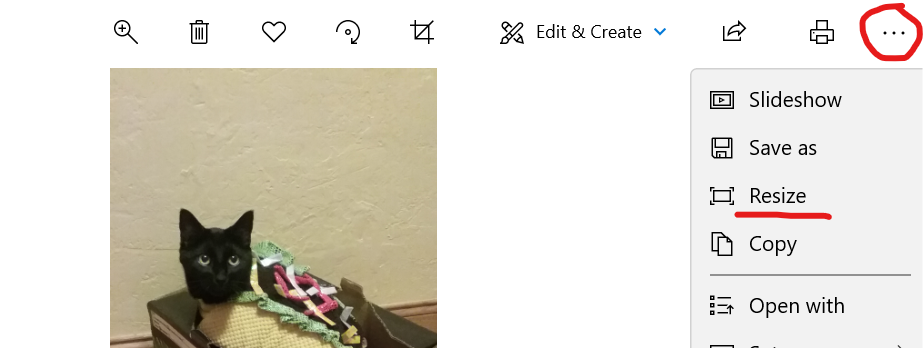
If your boss sends you a 5000×2000 pixel, 600 dpi photo with file size of 15mb to post on your website, you’ll inevitably need to shrink that thing down to a more optimal file size. In Photos, you will need to dig a little bit to find the resize tool. It is buried in the utility menu in the top right corner identified by the ellipses symbol, which looks like “…” and may be referred to as “those three dots.” From there you can select Resize.
You will then be presented with some fairly useless preset options, so you will want to choose Define Custom Dimensions. Now we can at least check the actual height and width to ensure minimum dimensions are observed. As a webmaster, you should hopefully have a decent notion for what general width you will need for a web-ready image. I usually pick 200-400px wide for a small headshot and around 1200-2000px wide for a full width image. The “Quality” setting is still a bit of a crap shoot and does not typically make much difference in the reduction of file size so better to leave that around 80% or higher.
There you have it, the basic processes you use daily for editing images for websites. If you need a little more power, read on for some excellent references of open-source software that can get you the rest of the way.
Open Source Graphics Software
Gimp
A favorite open-source photo editing software used by thrifty people around the world, the GNU Image Manipulation Program (GIMP) was first released back in 1996. With regular updates by dedicated volunteer developers the program became well-known in the Linux community and gained traction among users of the Microsoft Windows operating system in the early 2000s.
Just like photoshop, there is a bit of a learning curve to become familiar with all of the terms, tools and processes. But if you need to be able to do most of the things photoshop does, the price is right on this software.
Learn more and download the latest version at https://www.gimp.org/
Inkscape
A great alternative to Adobe Illustrator, Inkscape allows you to work with vector graphics like logos and other original designs that can be scaled to any size without losing quality.
Learn more and download the latest release at https://inkscape.org/.